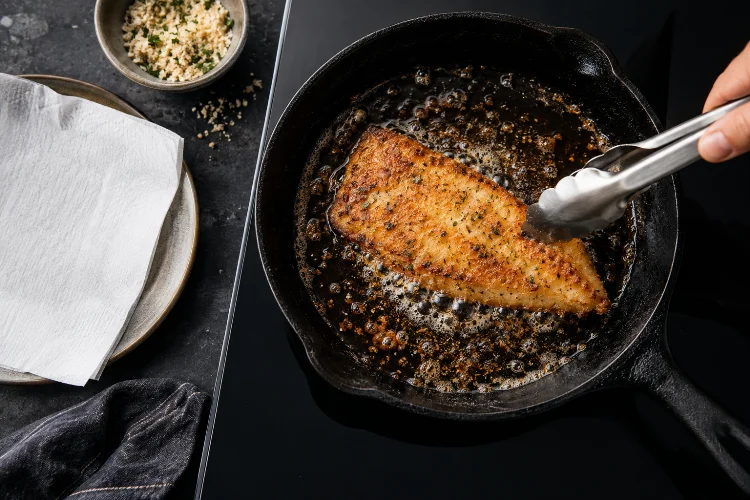
Few cooking moments are more frustrating than watching a beautiful piece of chicken, fish, or breaded cutlet turn from golden brown to nearly black in less than a minute.
Pan-frying looks straightforward, but the combination of hot oil, direct heat, and fast cooking leaves little room for distraction.
Learning how to pan-fry food without burning it is mostly about understanding heat control. The pan needs to be hot enough to create a crisp surface, but not so hot that the coating, spices, or oil burn before the center finishes cooking.
The type of pan, cooking oil, thickness of the food, moisture level, and even the amount of food in the skillet can change the result. Once you understand those variables, pan-frying becomes much easier to predict.
Instead of relying entirely on cooking times, you begin reading visual and sensory clues: the shimmer of the oil, the strength of the sizzle, the color of the crust, and even the smell coming from the pan.
Here is how to get that balance right.
1. Understand What Pan-Frying Actually Requires
Pan-frying sits somewhere between sautéing and deep-frying. Instead of using only a light coating of fat, you normally use enough oil to surround part of the food while still allowing it to touch the bottom of the pan.
That direct contact helps create browning and a crisp surface.
The Culinary Institute of America recommends maintaining enough oil for pan-frying so the food remains in contact with the bottom while oil reaches partway up its sides. It also suggests using a frying thermometer when greater temperature accuracy is needed.
For many pan-fried foods, the goal is simple: brown the outside at roughly the same pace that the inside cooks.
If the surface turns dark long before the center is ready, your heat is probably too high. If the food sits in oil without much sizzling and becomes greasy, the oil may be too cool.
Finding that middle ground is the foundation of good pan-frying.
2. Choose a Pan That Holds Heat Evenly
Your skillet has a major influence on how evenly food browns.
Heavy stainless-steel and cast-iron pans are popular because they retain heat well. Once properly heated, they are less likely to lose large amounts of heat when cold food is added.
Nonstick pans are useful for fragile foods such as fish fillets, pancakes, or delicate patties. Food Network, for example, recommends a nonstick skillet for pan-fried salmon because it makes flipping easier and reduces the chance of the fish sticking.
Whatever material you choose, avoid using a pan that is too small.
Crowding several pieces of food into a tight skillet traps moisture and lowers the cooking temperature. Instead of frying properly, the food may begin steaming.
If necessary, cook large quantities in two or three batches seperately. It might take a few extra minutes, but you will usually get a much crispier result.
3. Use the Right Oil for the Heat Level
Not every cooking fat behaves the same way at frying temperatures.
Some oils tolerate relatively high heat better than others. Neutral cooking oils are especially convenient because they allow the food’s flavor to remain dominant while providing enough heat tolerance for frying.
The American Heart Association notes that oils vary in their suitability for different cooking methods and advises against continuing to use oil once it starts smoking. Smoke indicates that the oil has reached a point where it begins degrading.
For general pan-frying, common choices include canola, vegetable, peanut, sunflower, and refined avocado oil.
Butter tastes great but burns more easily because its milk solids brown rapidly. If you want buttery flavor, one practical option is to fry primarily with oil and add a small amount of butter closer to the end.
Pay attention to smell as well. If the oil develops a sharp, burnt aroma before the food even goes into the pan, starting again with fresh oil is usually better than trying to rescue it.
4. Get the Oil Hot—but Not Too Hot
Heat control is where many home cooks run into trouble.
Food added to oil that is too cool tends to absorb more fat and may become heavy rather than crispy. On the other hand, excessively hot oil can darken the exterior before heat reaches the center.
According to CIA Foodies, frying oil in the range of roughly 350°F to 375°F produces immediate bubbling around food while still allowing some time before browning becomes aggressive.
You do not always need a thermometer, though.
When oil is ready, it often looks thinner and begins shimmering across the pan. A small crumb of breading or food should produce active bubbles as soon as it touches the oil.
If the oil starts producing visible smoke, your pan is probably too hot. The Kitchn similarly recommends lowering the heat or starting again if oil begins smoking before cooking.
Remember that burner settings are not universal. Medium heat on one stove might behave like medium-high on another, so treat the dial as a starting point rather than an exact temprature measurement.
5. Dry the Food Before It Hits the Pan
Water and successful pan-frying are not great partners.
When wet food enters hot oil, the moisture quickly turns into steam. This can lower the pan temperature, interfere with browning, and create potentially dangerous oil splatters.
Before frying chicken, fish, tofu, vegetables, or meat, pat the surface dry with paper towels when appropriate.
This is especially important for fish.
A dry skin surface can make a dramatic difference between crisp fish skin and a soft, rubbery layer. A Harvard Nutrition Source recipe for pan-seared white fish specifically calls for drying the skin before it goes into hot oil.
Breading should also be handled carefully.
If you are using flour, breadcrumbs, or another coating, shake away excessive loose material. Extra crumbs can fall into the oil, burn quickly, and eventually make everything in the pan taste bitter.
6. Adjust the Heat During Cooking
A common mistake is choosing one burner setting and refusing to touch it.
Good pan-frying often requires small adjustments.
You might begin around medium-high heat to establish a crisp exterior, then lower the burner to medium once good browning begins. Thick foods usually need gentler heat after the initial crust develops so the center can finish cooking without destroying the outside.
Food Network uses a similar principle when pan-frying pork chops: the skillet is heated over medium-high heat, and the meat is browned while being monitored for doneness.
Watch the food instead of the clock alone.
If breading goes from pale to dark brown in less than a minute, turn the heat down. If bubbling almost stops after food enters the skillet, you may need to increase the heat slightly.
You can also temporarily move the pan away from the burner when things get too aggressive. This gives the oil a chance to cool before cooking continues.
Pan-frying is interactive cooking, so controling the heat throughout the process is completely normal.
7. Know When to Flip the Food
Flipping too often can interfere with browning and may cause fragile foods to fall apart.
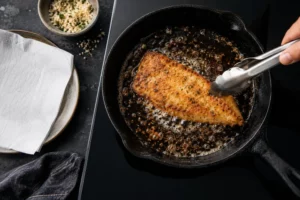
After placing food in the pan, give it enough time to establish a crust. Chicken cutlets, fish fillets, fritters, and breaded vegetables often release more easily once the surface has properly browned.
Use a spatula or tongs to lift one edge gently.
If the underside looks evenly golden, flip it. If the food is sticking badly, it may simply need more time.
Fish is a good example. Food Network’s pan-fried salmon method cooks center-cut fillets for several minutes on the first side before turning them, rather than constantly moving the fish around the pan.
After flipping, watch the second side carefully. Because the food is already hot, that side may cook faster than the first.
For breaded foods, move them as little as possible. Constant handling can knock off the coating and scatter crumbs into the oil, where they may burn.
8. Remove Burnt Crumbs Between Batches
Cooking multiple batches creates another problem: tiny particles accumulate in the oil.
Flour, breadcrumbs, spices, garlic, and marinade residue may detach from the first batch. Those particles continue frying even after the food has been removed.
Eventually, they become extremely dark.
If you put a fresh chicken cutlet into oil filled with burnt crumbs, those pieces can attach to the new food and give it a bitter flavor.
The CIA recommends removing loose food particles from frying oil during cooking.
Between batches, use a fine-mesh skimmer or heat-safe spoon to remove visible debris. If the oil itself has become very dark, smoky, or unpleasant-smelling, replacing it is usually the better option.
Give the fresh oil a moment to return to the correct heat before starting the next batch.
This small habit can make batch number four taste just as good as batch number one.
9. Match Food Thickness to Your Cooking Method
One reason food burns during pan-frying is simply that it is too thick.
Imagine frying a very thick chicken breast over high heat. The surface may become beautifully brown in a few minutes, but the center could still be undercooked.
Thinner, evenly sized pieces are generally easier to pan-fry.
Chicken cutlets, fish fillets, pork chops, tofu slices, vegetable fritters, and thin patties are ideal examples. If one part is much thicker than another, consider pounding, slicing, or portioning the food more evenly before cooking.
For meat and poultry, color is not a reliable safety test.
USDA guidance states that poultry should reach a minimum internal temperature of 165°F (73.9°C), while whole cuts of beef, pork, lamb, and veal should reach at least 145°F (62.8°C) followed by a three-minute rest. Ground meats should reach 160°F (71.1°C).
A food thermometer lets you check doneness without having to keep frying “just in case,” which often leads to dry or burnt food.
10. Learn to Read the Sizzle, Color, and Smell
Recipes provide times and temperatures, but your senses are often the fastest warning system.
A steady, lively sizzle generally indicates that the food is actively frying. Violent crackling may suggest excess moisture or excessively hot oil, while almost complete silence may indicate insufficient heat.
Color matters too.
Aim for golden brown rather than dark brown. Remember that food usually continues darkening slightly after it leaves the pan because residual heat remains in the crust.
Smell is another useful clue.
Nutty, toasted aromas are usually welcome. Sharp smoke or a bitter burnt smell means something needs attention immediatly.
With practice, these signals become surprisingly easy to recognize. You may eventually find yourself adjusting the burner automatically without even checking the setting.
Learning how to pan-fry food without burning it is less about following one perfect temperature and more about staying responsive while you cook.
Use a suitable pan, choose an oil that handles the required heat, dry your ingredients, avoid crowding, and adjust the burner whenever browning happens too quickly.
Just as importantly, match the thickness of the food to the technique and use a thermometer when cooking meat or poultry. Small habits such as removing burnt crumbs between batches can make a noticeable difference in flavor and appearance.
The next time you pan-fry chicken, fish, tofu, vegetables, or a breaded cutlet, watch the oil and listen to the sizzle instead of relying only on a timer. Practice that awareness, and achieving a crisp, golden crust without burning dinner will become much easier.